
はじめに
今回はCRUD操作について紹介します。
CRUDとは何か、Create, Read, Update, Delete の事です。
そうです、DBの基本的な操作の事です。
Readについてはこちらの記事を参考にしてください。
SpringBootとGradleのススメ ~DB連携編(JPA)
上記記事を元に実装していきたいと思います。
では、Create, Update, Deleteについて紹介します。
Create
DBにデータの挿入をしたいと思います。
テンプレの修正
まずは挿入データの入力欄を作成します。
index.html
<!DOCTYPE html>
<html xmlns:th="http://www.thymeleaf.org">
<head>
<meta charset="UTF-8"></meta>
<title>INDEXページ</title>
</head>
<body>
<div>
<form method="post" action="/insert" th:object="${formInsert}">
<p>Insert</p>
<input type="text" name="name" size="50" placeholder="名前"></input>
<input type="text" name="age" size="50" placeholder="年齢"></input>
<input type="submit" value="Insert"></input>
</form>
</div>
<tabl>
<thead>
<tr>
<th>ID</th>
<th>名前</th>
<th>年齢</th>
</tr>
</thead>
<tbody>
<tr th:each="data:${data}">
<td th:text="${data.id}"></td>
<td th:text="${data.name}"></td>
<td th:text="${data.age}"></td>
</tr>
</tbody>
</table>
</body>
</html>
入力欄としてformを追加しました。
Controllerの修正
次にデータ挿入処理を実装します。
MainController.java
package dbtest.controller;

import org.springframework.beans.factory.annotation.Autowired;
import org.springframework.stereotype.Controller;
import org.springframework.transaction.annotation.Transactional;
import org.springframework.web.bind.annotation.ModelAttribute;
import org.springframework.web.bind.annotation.RequestMapping;
import org.springframework.web.servlet.ModelAndView;
import dbtest.entity.Idol;
import dbtest.repository.IdolRepository;

@Controller
public class MainController {
    @Autowired
    IdolRepository repository;
    @RequestMapping("/")
    private ModelAndView index(ModelAndView mav) {
        mav.setViewName("index");
        Iterable<Idol> list = repository.findAll();
        mav.addObject("data", list);
        return mav;
    }
    @RequestMapping("/insert")
    @Transactional(readOnly=false)
    private ModelAndView insert(@ModelAttribute("formInsert") Idol idol, ModelAndView mav) {
        repository.saveAndFlush(idol);
        return new ModelAndView("redirect:/");
    }
}
insertメソッドを作成しました。
アノテーション
@Transactional 書き込み許可設定
@ModelAttribute Entityのインスタンスを自動で用意する設定(formで送信されたデータが自動でまとめられる)。引数はテンプレでth:objectで指定した値。
保存はSaveAndFlushで行なっています。
動作確認
動作を見てみます。
localhost:8080 へアクセスします。
入力欄ができでいます。
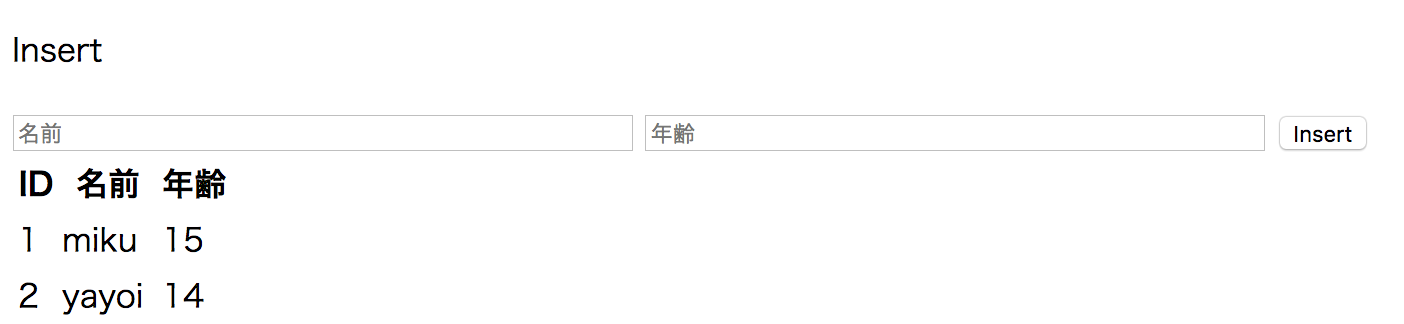
では入力してみましょう
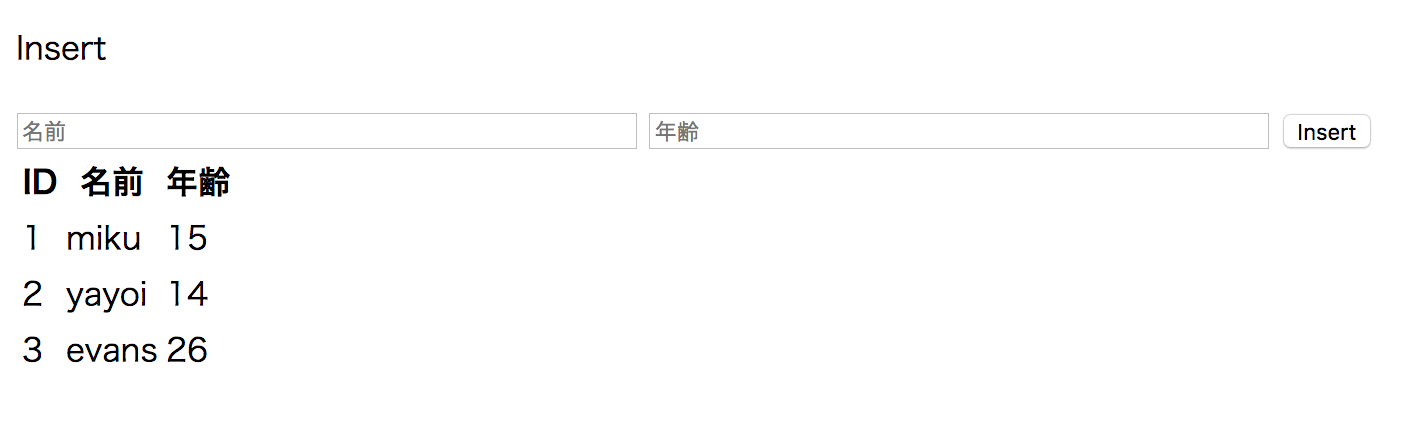
データの挿入完了です。
Update
次はデータの更新処理をしたいと思います。
テンプレの修正
以下のように更新用formを作成します。
index.html
<!DOCTYPE html>
<html xmlns:th="http://www.thymeleaf.org">
<head>
<meta charset="UTF-8"></meta>
<title>INDEXページ</title>
</head>
<body>
<div>
<form method="post" action="/insert" th:object="${formInsert}">
<p>Insert</p>
<input type="text" name="name" size="50" placeholder="名前"></input>
<input type="text" name="age" size="50" placeholder="年齢"></input>
<input type="submit" value="Insert"></input>
</form>
</div>
<div>
<form method="post" action="/update" th:object="${formUpdate}">
<p>Update</p>
<input type="text" name="id" size="50" placeholder="ID"></input>
<input type="text" name="name" size="50" placeholder="名前"></input>
<input type="text" name="age" size="50" placeholder="年齢"></input>
<input type="submit" value="Update"></input>
</form>
</div>
<table>
<thead>
<tr>
<th>ID</th>
<th>名前</th>
<th>年齢</th>
</tr>
</thead>
<tbody>
<tr th:each="data:${data}">
<td th:text="${data.id}"></td>
<td th:text="${data.name}"></td>
<td th:text="${data.age}"></td>
</tr>
</tbody>
</table>
</body>
</html>
Controllerの修正
更新用処理を実装します。
MainController.java
package dbtest.controller;

import org.springframework.beans.factory.annotation.Autowired;
import org.springframework.stereotype.Controller;
import org.springframework.transaction.annotation.Transactional;
import org.springframework.web.bind.annotation.ModelAttribute;
import org.springframework.web.bind.annotation.RequestMapping;
import org.springframework.web.servlet.ModelAndView;
import dbtest.entity.Idol;
import dbtest.repository.IdolRepository;

@Controller
public class MainController {
    @Autowired
    IdolRepository repository;
    @RequestMapping("/")
    private ModelAndView index(ModelAndView mav) {
        mav.setViewName("index");
        Iterable<Idol> list = repository.findAll();
        mav.addObject("data", list);
        return mav;
    }
    @RequestMapping("/insert")
    @Transactional(readOnly=false)
    private ModelAndView insert(@ModelAttribute("formInsert") Idol idol, ModelAndView mav) {
        repository.saveAndFlush(idol);
        return new ModelAndView("redirect:/");
    }
    @RequestMapping("/update")
    @Transactional(readOnly=false)
    private ModelAndView update(@ModelAttribute("formUpdate") Idol idol, ModelAndView mav) {
        repository.saveAndFlush(idol);
        return new ModelAndView("redirect:/");
    }
}
insert処理、update処理を比べてみると、同じである事がわかります。
insertとupdateの処理はsaveAndFlushで行う事ができます。
違いは引数のEntityにIDが指定されているかどうかです。
なのでこの二つのメソッドは分ける必要はありませんが、わかりやすくするために今回は分けています。
動作確認
ではアクセスして動作の確認です。
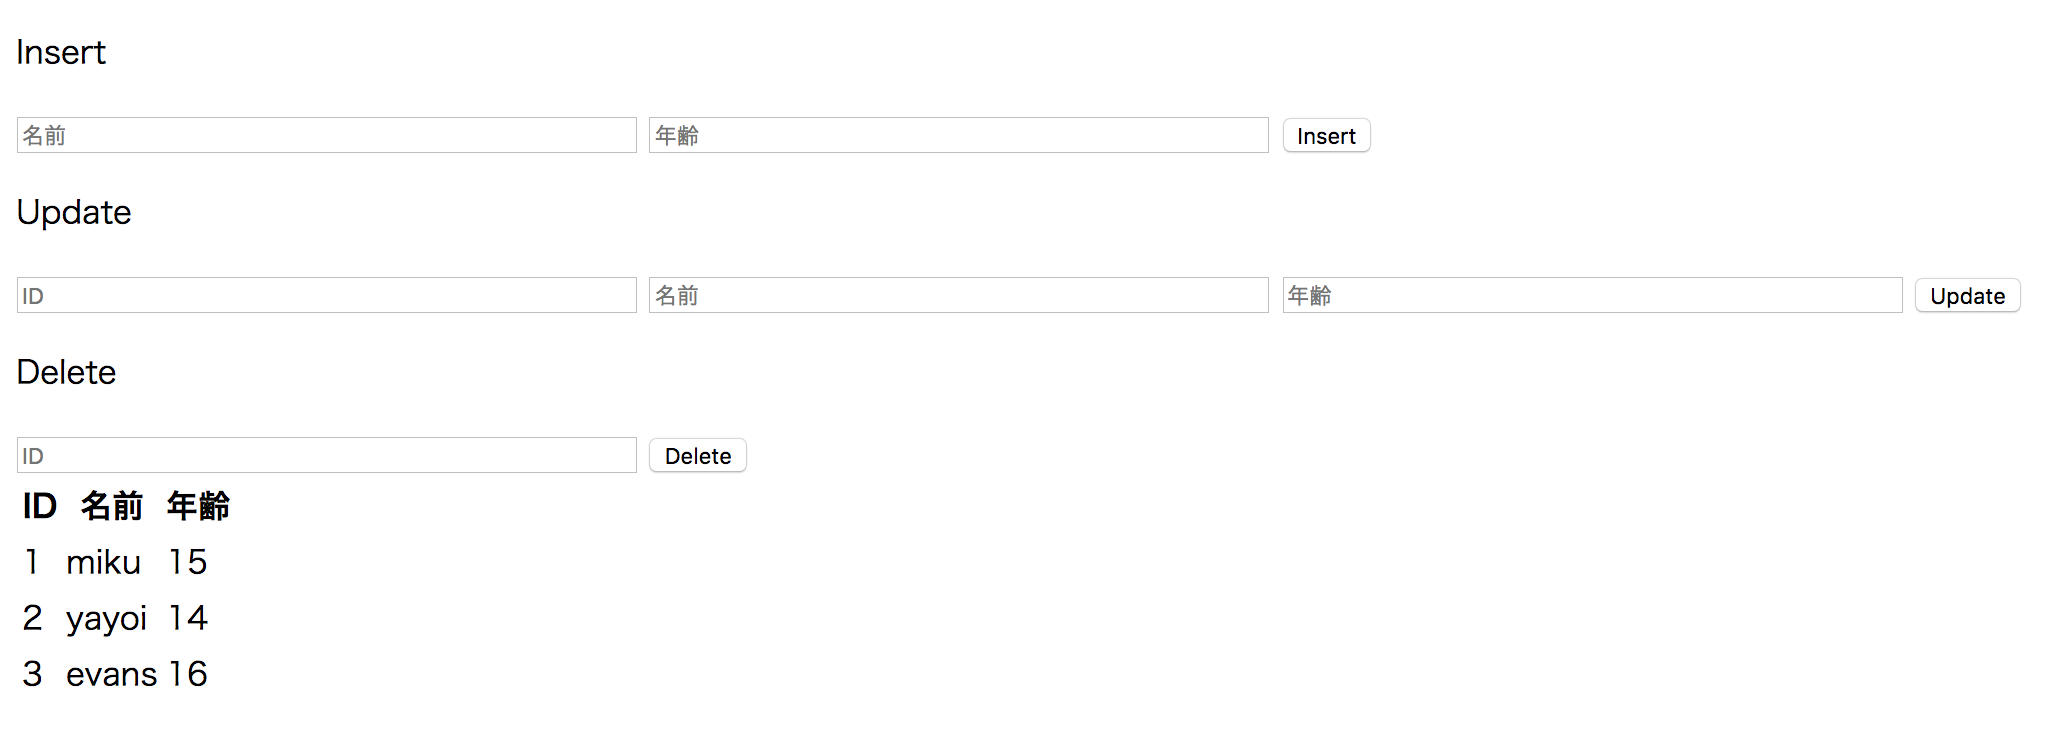
update用のformができています。
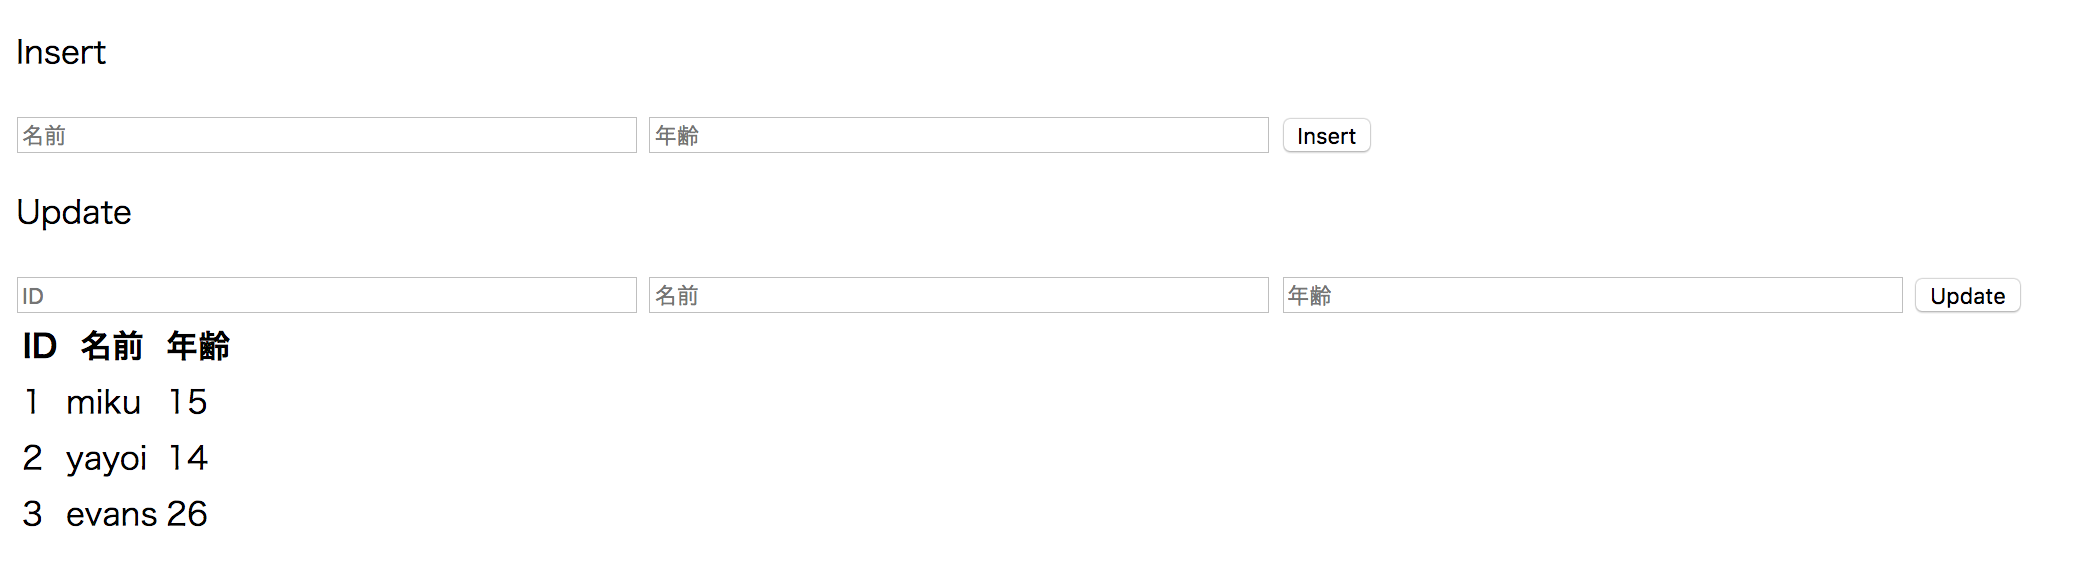
こちらにIDと更新データを入力し、ボタン押下します。
今回は年齢を変えてみます。
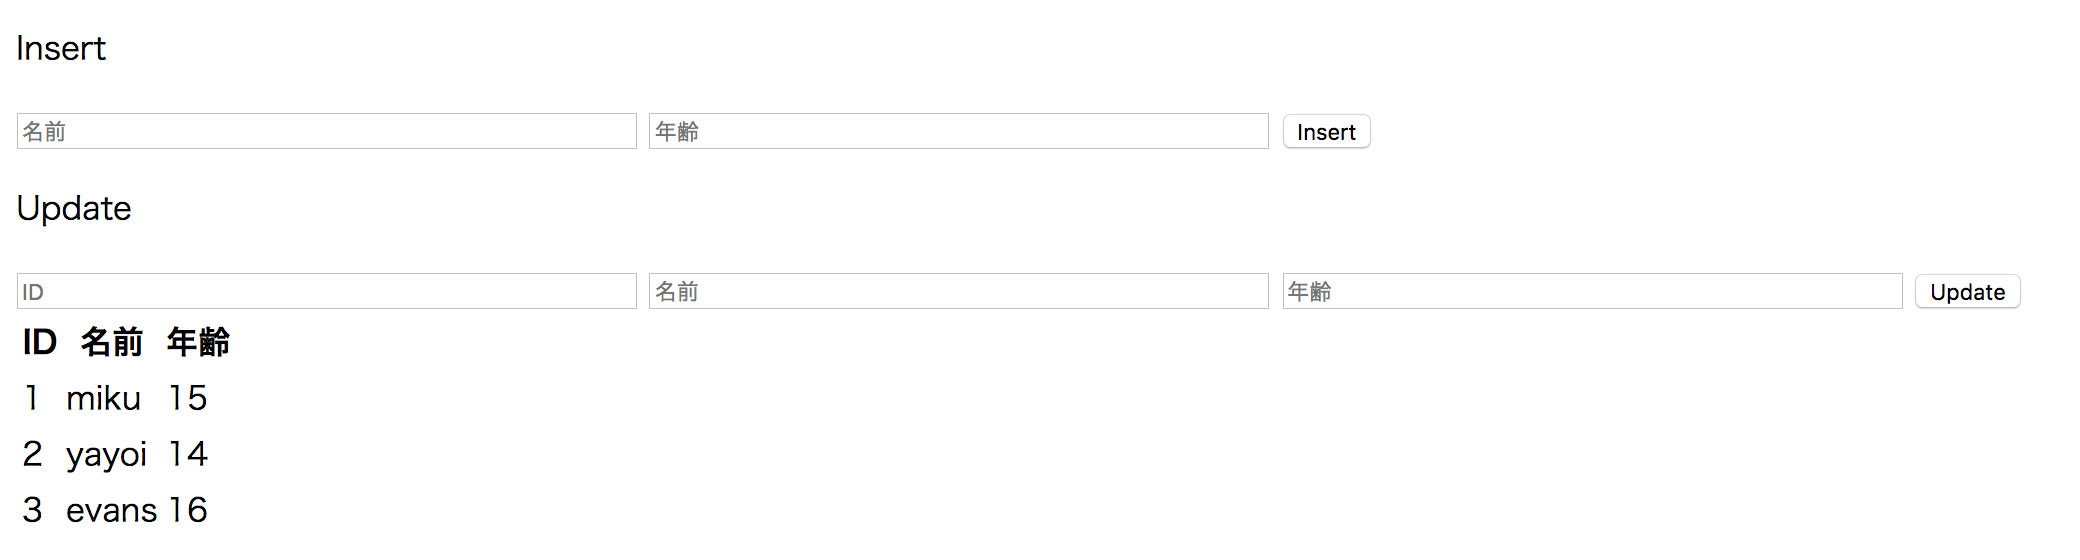
更新ができました。
Delete
最後にデータ削除処理について実装します。
テンプレの修正
削除用formを作成します。
index.html
<!DOCTYPE html>
<html xmlns:th="http://www.thymeleaf.org">
<head>
<meta charset="UTF-8"></meta>
<title>INDEXページ</title>
</head>
<body>
<div>
<form method="post" action="/insert" th:object="${formInsert}">
<p>Insert</p>
<input type="text" name="name" size="50" placeholder="名前"></input>
<input type="text" name="age" size="50" placeholder="年齢"></input>
<input type="submit" value="Insert"></input>
</form>
</div>
<div>
<form method="post" action="/update" th:object="${formUpdate}">
<p>Update</p>
<input type="text" name="id" size="50" placeholder="ID"></input>
<input type="text" name="name" size="50" placeholder="名前"></input>
<input type="text" name="age" size="50" placeholder="年齢"></input>
<input type="submit" value="Update"></input>
</form>
</div>
<div>
<form method="post" action="/delete" th:object="${formDelete}">
<p>Delete</p>
<input type="text" name="id" size="50" placeholder="ID"></input>
<input type="submit" value="Delete"></input>
</form>
</div>
<table>
<thead>
<tr>
<th>ID</th>
<th>名前</th>
<th>年齢</th>
</tr>
</thead>
<tbody>
<tr th:each="data:${data}">
<td th:text="${data.id}"></td>
<td th:text="${data.name}"></td>
<td th:text="${data.age}"></td>
</tr>
</tbody>
</table>
</body>
</html>
Controllerの修正
削除処理を実装します。
MainController.java
package dbtest.controller;

import org.springframework.beans.factory.annotation.Autowired;
import org.springframework.stereotype.Controller;
import org.springframework.transaction.annotation.Transactional;
import org.springframework.web.bind.annotation.ModelAttribute;
import org.springframework.web.bind.annotation.RequestMapping;
import org.springframework.web.servlet.ModelAndView;
import dbtest.entity.Idol;
import dbtest.repository.IdolRepository;

@Controller
public class MainController {
    @Autowired
    IdolRepository repository;
    @RequestMapping("/")
        private ModelAndView index(ModelAndView mav) {
        mav.setViewName("index");
        Iterable<Idol> list = repository.findAll();
        mav.addObject("data", list);
        return mav;
    }
    @RequestMapping("/insert")
    @Transactional(readOnly=false)
    private ModelAndView insert(@ModelAttribute("formInsert") Idol idol, ModelAndView mav) {
        repository.saveAndFlush(idol);
        return new ModelAndView("redirect:/");
    }
    @RequestMapping("/update")
    @Transactional(readOnly=false)
    private ModelAndView update(@ModelAttribute("formUpdate") Idol idol, ModelAndView mav) {
        repository.saveAndFlush(idol);
        return new ModelAndView("redirect:/");
    }
    @RequestMapping("/delete")
    @Transactional(readOnly=false)
        private ModelAndView delete(@ModelAttribute("formDelete") Idol idol, ModelAndView mav) {
        repository.delete(idol);
        return new ModelAndView("redirect:/");
    }
}
削除処理はdeleteで行えます。
動作確認
アクセスすると削除用フォームが表示されています。
IDを指定して削除ボタンを押下
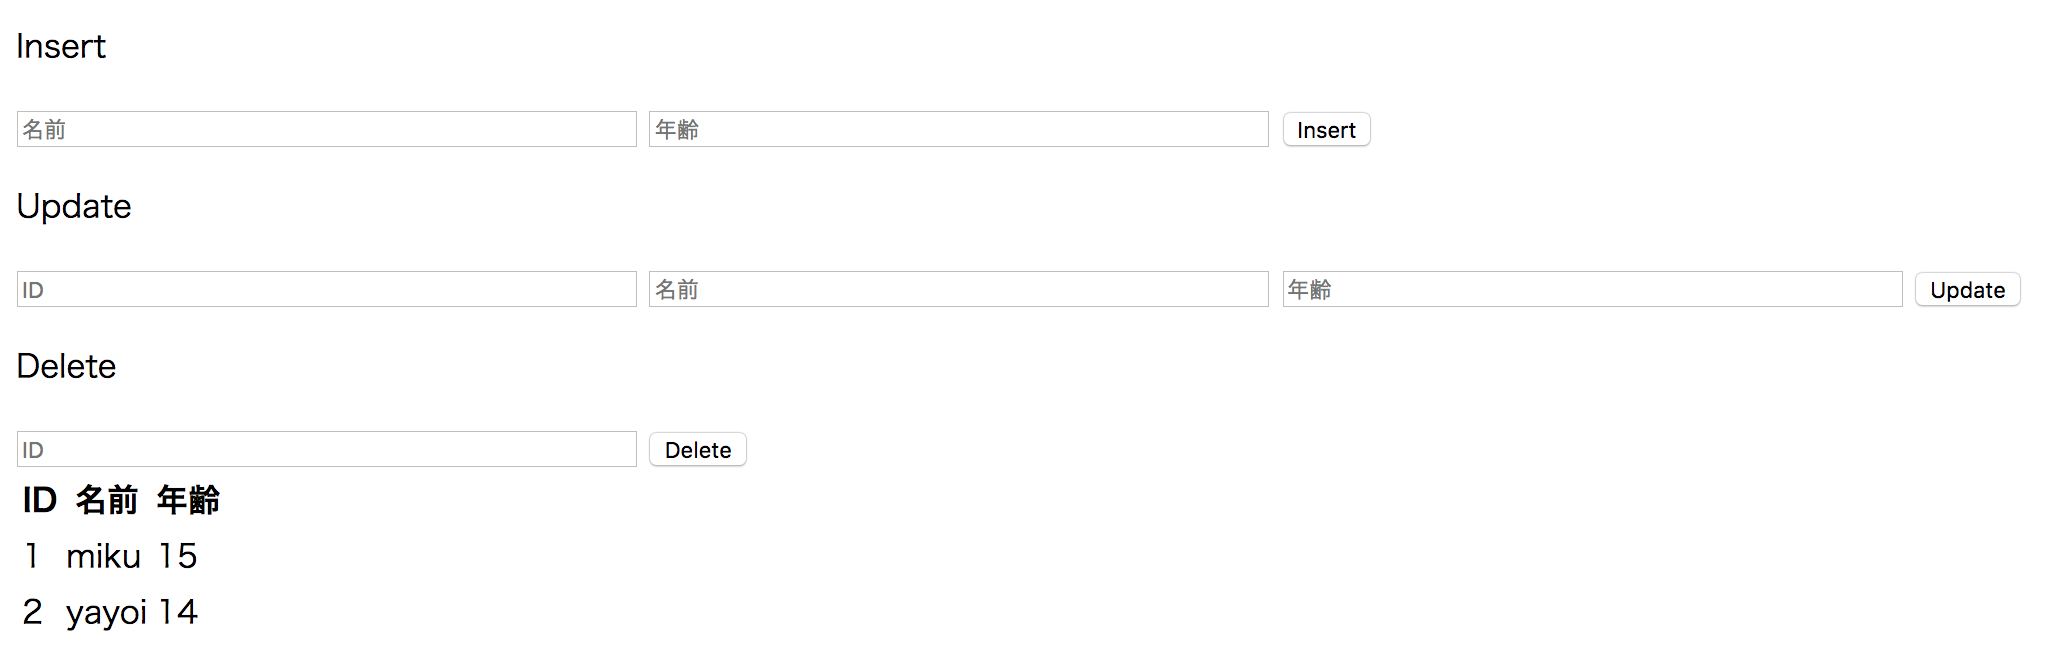
データの削除に成功しました。
おわりに
SpringBoot + JPA を使用してCRUD操作をしてみました。
SQLを書かずに簡単にDB操作を行える点がとても気に入りました。
あまり触れませんでしたが、saveやdelete等の処理はRepositoryクラスでJpaRepositoryを継承している為行う事ができます。
気になりましたらソースを確認してみてください。
スマートに書けるのはいい点ですが、慣れるのに少し時間がかかりそうですね。

コメント